Table of Contents
ToggleYour Maytag refrigerator keeps your family’s food fresh, until something stops working. When that happens, you’ve got two choices: panic or roll up your sleeves. The good news is that many Maytag refrigerator parts are accessible for DIY replacement without calling a technician. From water filters to door seals, understanding what you’re working with and when to tackle it yourself versus calling a pro can save you time and money. This guide walks you through identifying common Maytag refrigerator parts, sourcing replacements, and handling repairs with confidence.
Key Takeaways
- Many Maytag refrigerator parts like water filters, door seals, and defrost drains are accessible for DIY replacement without calling a technician, saving time and money.
- Always locate your Maytag model and serial number from the sticker inside the fridge or freezer door before ordering parts, as different models use different components.
- Water filters should be replaced every 6 months if heavily used, and door gaskets typically last 5–10 years before wearing out and requiring replacement.
- DIY-safe repairs include filter swaps, gasket replacements, and drain unclogging, but professional service is required for sealed system work, refrigerant issues, and electronic control board problems.
- Use online resources like Family Handyman tutorials and certified retailers such as AJ Madison to find the correct Maytag refrigerator parts and view step-by-step installation guides.
Understanding Your Maytag Refrigerator Components
Before you order a single part, get to know what’s inside your Maytag. The compressor pumps refrigerant through sealed lines to cool your unit, this is not a DIY fix, so we’ll skip it. The condenser coils sit on the back or bottom and shed heat: these you can clean. The evaporator coil (inside the fridge) circulates cold air: accessing it is doable, though it requires some patience.
Your Maytag has a defrost cycle controlled by a timer or electronic control board. Ice buildup issues often trace back to a clogged defrost drain, something you absolutely can clear yourself. The door seals (called gaskets) prevent cold air from leaking out: they wear over time and are straightforward to replace. Water lines feed your ice maker and water dispenser: pinhole leaks here are fixable without a professional license.
Get your model and serial number from the sticker inside the fridge or freezer door. Write it down now. You’ll need it for ordering the exact parts that fit your unit. Maytag uses different components across their product lines, so “refrigerator parts” is too broad, your specific model is what matters.
Essential Refrigerator Parts to Keep on Hand
Stock these common replacement parts in your garage or utility closet so you’re not scrambling when something quits on a Sunday.
Water filters (typically MFI2567AES or similar model-specific part numbers) should be replaced every 6 months if you use your dispenser heavily. A fresh filter improves water and ice taste and prevents sediment from clogging lines. Refrigerator door seals/gaskets ($30–$80 depending on which door) wear out after 5–10 years: they’re held on with a groove or screws and take under 30 minutes to swap. A defrost drain pan ($25–$50) catches condensation: if it cracks, water pools under your fridge. Thermal fuses ($15–$30) protect the compressor and blow if the system overheats, they’re a common failure point.
Check your warranty first. Maytag appliance warranty details vary: some plans cover parts for the first year. If your unit is under coverage, a manufacturer-covered repair might be free or heavily subsidized.
Water Filters and Ice Maker Components
Water filters are the most frequently replaced Maytag refrigerator part, and for good reason, they wear out, and dirty filters fail silently. Your Maytag uses either a side-by-side filter cartridge (clips in horizontally) or a under-cabinet filter (installed below the fridge). Know which one you have before ordering. Clogged filters reduce water pressure at the dispenser and starve the ice maker of water.
Ice maker components include the fill valve (opens to let water in), the ejector arm (knocks ice out of the mold), and the auger motor (pushes ice out to the dispenser). Ejector arm failures are common and cheap to fix, usually under $50. Fill valve leaks require shutting off the water supply, unclipping the valve from the back panel, and snapping in a replacement ($60–$100). If your ice maker stops producing but the water line isn’t frozen, the fill valve or motor is next to check.
How to Identify and Source the Right Parts
Wrong part orders are expensive delays. Use your Maytag’s model and serial number, found on a sticker inside the fridge or freezer, to search on the manufacturer’s parts site or certified retailers like AJ Madison or Sears Parts Direct. Avoid guessing: a part that fits a 2023 Maytag French door might not fit your 2019 side-by-side.
Online retailers vs. big-box stores: Best Buy and Home Depot stock common parts like filters and door gaskets, and you can walk out the same day. Specialty sites stock deeper inventories but ship in 3–5 days. OEM (Original Equipment Manufacturer) parts are made by Maytag: they cost more but fit perfectly and come with manufacturer backing. Aftermarket parts are cheaper and often work fine, though fit and longevity can vary.
Take a photo of your part before ordering. If you’re replacing a water filter, snap the model label. If it’s a door seal, photograph how it installs (groove, screw holes, clips). These details prevent buyer’s remorse and wrong returns. Family Handyman repair tutorials often include Maytag-specific guides: searching your exact model there can surface step-by-step videos that show you the part in context.
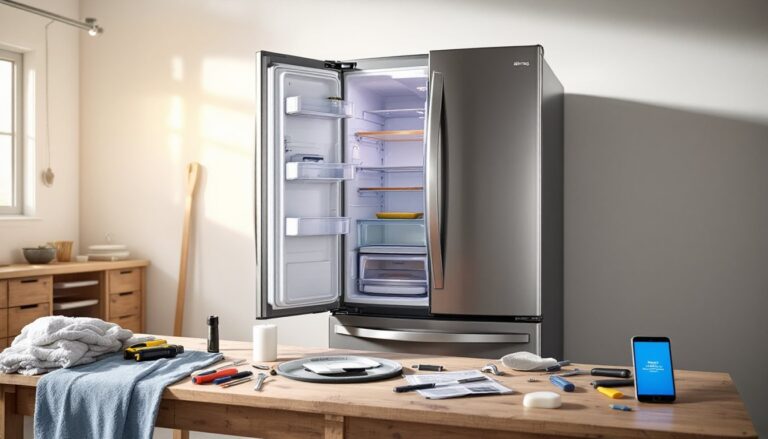
DIY Replacement Tips for Homeowners
Prep work makes or breaks a DIY repair. Start by unplugging your Maytag or shutting off the breaker if the repair involves electrical components. If you’re working with water lines, turn off the water supply valve (usually behind or under the fridge). Let the freezer defrost for 30 minutes so ice doesn’t clog the drain.
For water filter replacement: Locate the filter (side of fridge, top grille, or under-cabinet). Most modern Maytags use a quarter-turn or push-in cartridge, no tools needed. Turn the old one counterclockwise or pull straight out, discard it, and insert the new filter. Run water through the dispenser for 30 seconds to flush air. Done.
For door seals: Remove the old gasket by unclipping it from the groove or unscrewing fasteners. Clean the groove with a damp cloth (old gasket material sheds grime). Insert the new gasket and snap it in place or tighten screws hand-tight, don’t overtighten. Close the door and check the seal by closing it on a dollar bill: it should pinch slightly.
For defrost drain clogs: Find the drain hole (back wall, bottom of fridge or freezer) and flush it with warm water using a turkey baster or small syringe. If it’s frozen, use a hairdryer on low heat to thaw, then flush. Blow air through it to confirm it’s clear. Repeat from the drain pan underneath.
Essential tools: Screwdrivers (Phillips and flathead), adjustable wrench, flashlight, and maybe needle-nose pliers. You don’t need power tools for appliance work. Wear gloves when handling old gaskets (they shed material) and keep a towel handy when working near water lines. Maytag refrigerators aren’t delicate, but rushing causes spilled water and frustration.
When to Call a Professional vs. DIY Repairs
DIY safe: Water filter replacement, door gasket swap, drain pan cleaning, defrost drain unclogging, and ejector arm replacement. These are cosmetic-adjacent and don’t require the fridge to be sealed or pressurized.
Professional required: Compressor repair, refrigerant leaks, sealed system work (evaporator or condenser issues), and electronic control board replacement. If you smell oily residue or see frost on the evaporator coils where it shouldn’t be, the sealed system has failed, that’s a technician’s job. Refrigerant is regulated (EPA), and opening the sealed system without certification voids your warranty and is illegal.
If your fridge cycles on and off rapidly or won’t hold temperature, the compressor, thermostat, or control board is likely at fault. A technician has diagnostic tools (multimeter, pressure gauges) and warranty support that DIY can’t match. Good Housekeeping home appliance reviews include reliability data on major brands: checking real user reports can help you decide if a repair is worth the cost or if replacement makes sense.
Permit and code considerations: Maytag refrigerator repairs generally don’t require permits unless you’re installing a new water line that ties into your home’s plumbing, check your local code. Most homeowners handle this risk-free, but electrical work that involves the control board should go to a licensed tech if you’re unsure.
Conclusion
Your Maytag refrigerator is a machine, and machines have replaceable parts. Filter swaps, gasket changes, and drain cleanings are well within reach for a competent DIYer with a screwdriver and basic tools. Order the right part using your model number, follow one of the many excellent visual guides available online, and take your time. When something involves the sealed refrigeration system or electronics you can’t safely access, call a professional, that’s not failure, it’s smart. Keep your warranty paperwork handy and maintain your unit with regular filter changes and drain checks. Your fridge will reward you with years of reliable cold storage.