Table of Contents
ToggleA standing puddle of murky water at the bottom of your KitchenAid dishwasher isn’t just gross, it’s a sign something’s wrong. Water that doesn’t drain means dishes don’t get clean, odors build fast, and you’re left manually bailing out the tub before the next load. The good news: nine times out of ten, a clogged drain filter, kinked hose, or stuck valve is the culprit, and you can fix it yourself in under an hour with basic tools. This guide walks you through six troubleshooting steps to pinpoint the problem and get your dishwasher draining again.
Key Takeaways
- A KitchenAid dishwasher not draining is usually caused by a clogged filter, kinked hose, or stuck valve—most fixable in under an hour with basic tools.
- Always start troubleshooting by checking the drain filter for debris and the drain hose for blockages, as these simple fixes resolve the majority of drainage problems.
- Verify the drain valve functions by listening for a click during the drain cycle; if you hear nothing, the solenoid may need professional replacement.
- Inspect your home’s drain line and sink strainer for clogs, as a blocked house drain can cause water to back up into the dishwasher.
- Call a professional technician if you encounter electrical component failures, pump grinding sounds, structural leaks, or if your dishwasher is under warranty.
Check The Drain Filter For Debris
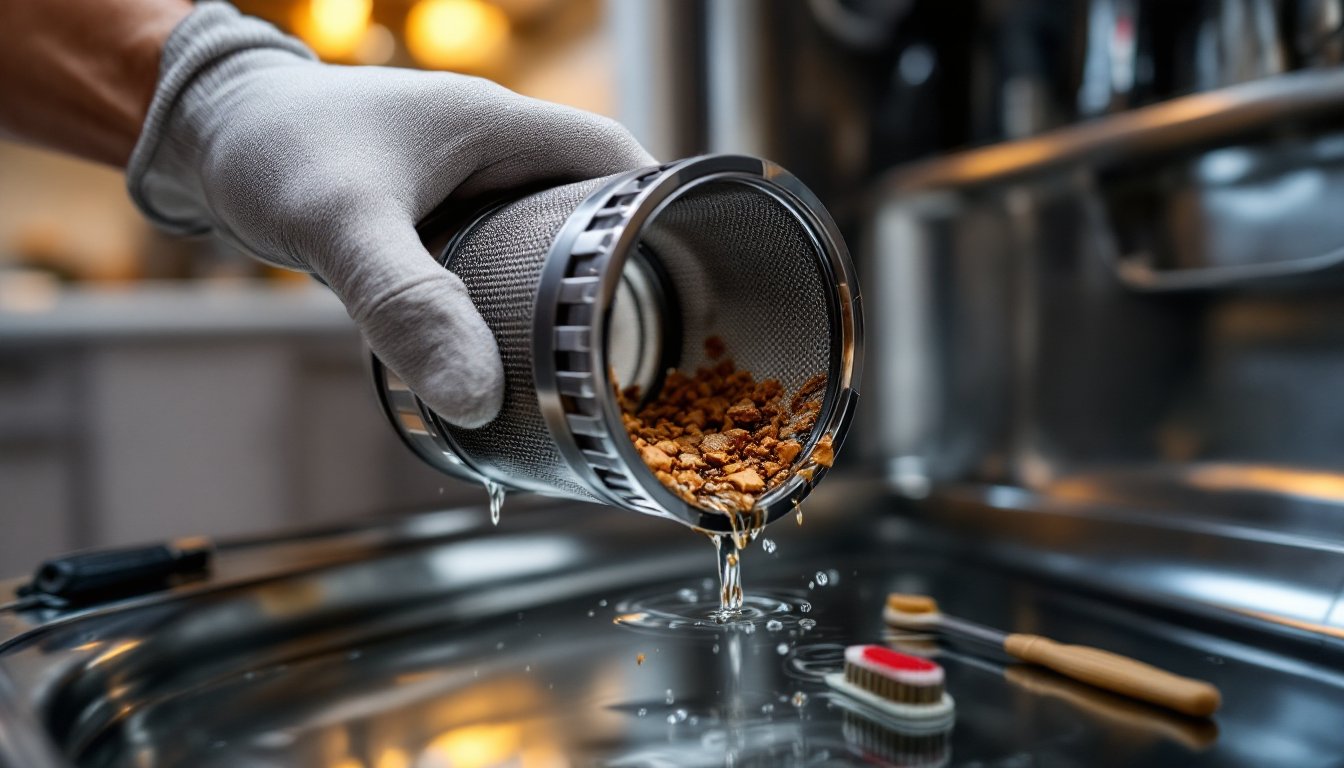
The drain filter is your first stop. It’s a mesh or cylindrical screen at the bottom of the dishwasher tub that catches food scraps and prevents them from clogging the pump. Over time, it gets gunked up and water backs up.
Step-by-step:
- Turn off the dishwasher and let any standing water cool for a few minutes.
- Open the door and locate the filter assembly, usually a cylindrical or basket-shaped component in the center of the tub floor.
- Twist it counterclockwise (or push down and lift, depending on your model) to remove it.
- Hold it under running water and use an old toothbrush to scrub away trapped food, grease, and mineral deposits.
- Check for cracks in the filter mesh. If it’s damaged, you’ll need a replacement filter (typically $15–$30).
- Reinstall the filter by twisting clockwise until snug, not over-tight.
Run a short test cycle. If water still pools, move to the next step. Many homeowners skip this simple fix and assume the problem is deeper than it is, so don’t overlook it even if the filter looks “mostly clean.”
Inspect The Drain Hose For Clogs
The drain hose carries water from the pump up and out of the dishwasher to your home’s drain line. If it’s kinked, pinched, or clogged with sludge, water can’t flow out.
What to look for:
- Position: Pull the dishwasher out slightly and inspect the hose from the unit to the cabinet opening. It should curve gently, no sharp bends or kinks.
- Blockages: Disconnect the hose at both ends (place a bucket underneath to catch residual water) and hold it up to a light. Look for dark buildup or debris. Blow through it gently or run water backward through it to dislodge blockages.
- Damage: Check for cracks, splits, or hardened sections. A compromised hose needs replacement (typically $20–$50 for KitchenAid models).
- Connection fit: Make sure the hose is seated firmly at the pump outlet and sink drain inlet. A loose connection lets water leak instead of drain.
Reconnect everything securely and run a test cycle. Common drainage issues are.
Clean Or Replace The Spray Arm
The spray arm is the spinning component that distributes water during the wash cycle. If its holes are clogged with mineral deposits or debris, water pressure drops and drainage backs up, water that should cycle through gets trapped.
Cleaning procedure:
- Remove the spray arm by unscrewing the center bolt or twisting the collar counterclockwise (varies by model).
- Hold it under warm running water and use a straightened paperclip or small brush to clear each hole. You’ll see mineral buildup, especially if you live in a hard-water area.
- Soak it in a bowl of equal parts white vinegar and warm water for 15–20 minutes if deposits are stubborn.
- Rinse thoroughly and reinstall, ensuring it spins freely without binding.
If the arm is cracked or won’t spin, replacement parts run $30–$60. A clogged spray arm also reduces wash performance, so this step improves overall dishwasher function, not just drainage. Test the cycle again before moving forward.
Verify The Drain Valve Is Functioning
The drain valve is a small solenoid-controlled component that opens to let water exit during the drain cycle. If it’s stuck closed or fails electrically, water stays put.
How to test it:
- Run a short cycle and listen near the bottom of the dishwasher during the drain phase. You should hear a faint click or buzz when the valve activates.
- If you hear nothing, the solenoid may be dead, this typically requires a replacement part ($40–$80) and electrical knowledge. Not a beginner repair.
- If you hear the click but water doesn’t drain, the valve cartridge itself may be stuck. Turn off power, then try gently tapping the valve housing with a rubber mallet to free a mechanical jam. Spray the area lightly with penetrating oil if accessible.
- Allow 15 minutes for the oil to soak, then power on and test again.
This is where troubleshooting gets more technical. If tapping doesn’t work and you’re not comfortable with electrical components, a technician is your next move. The valve sits below the tub floor on most KitchenAid models and requires partial disassembly to access.
Check Your Home’s Drain Line Connection
Sometimes the dishwasher isn’t the problem, your home’s drain system is. If the sink drains slowly or backs up when the dishwasher runs, the issue likely lies in the house drain line.
What to inspect:
- Drain line blockage: The dishwasher hose connects either to the sink’s trap or directly to the house drain. If that line is clogged with grease, food, or mineral buildup, water backs up into the dishwasher.
- High drain loop: Check that the hose runs upward (toward the underside of the counter) before dropping down to the drain. This prevents siphoning and allows gravity to assist drainage. If the hose dips low or lacks a high loop, water can pool.
- Sink strainer: Remove and clean the sink strainer basket. Buildup here reduces the drain’s capacity.
- Garbage disposal: If connected through a disposal, run it briefly with hot water to clear any blockage. A full disposal backs up the dishwasher.
If the kitchen sink itself drains slowly, you may have a clogged drain line throughout the house. A plunger or drain snake can clear minor clogs, but if the issue persists, call a plumber. This isn’t a dishwasher problem, it’s a house plumbing issue.
When To Call A Professional Repair Technician
Not every drainage issue is DIY-friendly. Call a technician if you’ve tried the above steps and water still pools, or if you encounter these red flags:
- Electrical components: If the drain valve needs replacement or the control board is malfunctioning, leave it to a professional. KitchenAid dishwashers use sealed electrical systems: improper repair voids warranties and creates safety hazards.
- Pump failure: If you hear a grinding noise or the pump doesn’t spin (visible through the filter opening after removal), the pump assembly is likely dead. Replacement runs $150–$300 and requires technical skill.
- Structural leaks: Water pooling around the base of the dishwasher indicates a tub seal failure or internal crack. This requires full tub replacement, a job for licensed technicians only.
- Age and warranty: If your dishwasher is under warranty and requires internal repairs, contact KitchenAid support or an authorized dealer. Unauthorized repairs can forfeit coverage.
A professional can diagnose. For a mid-range KitchenAid model, a service call typically costs $100–$150 plus parts. It’s a reasonable expense versus spending hours on trial-and-error or damaging the unit further.
Conclusion
A non-draining KitchenAid dishwasher is frustrating, but it’s rarely a catastrophic failure. Start with the filter and hose, those two fixes resolve most cases. If drainage persists, work through the spray arm, valve, and house drain connection methodically. Know your limits: if you’re uncomfortable with electrical work or structural repairs, don’t hesitate to call a pro. Getting your dishwasher back in working order saves time and keeps your kitchen running smoothly.